Using PyPotteryLens
Clicking on him brings you straight back to this guide.
GUI Overview
The program is composed of a series of tab that represent the image extraction process:
- Project Manager
- PDF Document Processing
- Apply Model
- Review Annotations and extract masks
- Tabular Information
- Post Processing
Project Manager
Like other tools in the PyPottery suite, PyPotteryLens uses a project management system.
You can create a project by entering a name in the text box, along with an optional description and an icon.
Once created, the project will appear in the “Your Projects” list.
Selecting a project will display its name in the status bar.
PDF Document Processing
In this tab, you can upload and process a PDF file, transforming it into a series of images.
Clicking on Upload PDF to current project will open a dialog window to select the PDF file.
The Split Scanned checkbox must be checked BEFORE selecting the file if the PDF to be processed has 2 pages side-by-side.
Once the PDF is processed, you can proceed to the next tab.
Apply Model
In this tab, you can use the Computer Vision (CV) model to extract information.
GUI Layout
The GUI is divided into two parts:
- Right Side: A gallery containing the images. Clicking on an image opens it in full screen. In the top right of each image, there is an icon that allows you to exclude the page from processing. To re-include an image, simply click the checkmark again.
- Left Side: Contains the model parameters.
Parameters
- Model Selection: Allows you to select the model to apply.
- Model Parameters: You can define the confidence threshold for the model as well as some post-processing operations for the masks. Here the parameters:
- Confidence: The confidence threshold for the model.
- Kernel size: The size of the kernel for the post-processing operations.
- Iterations: The number of iterations for the post-processing operations.
- Advanced Options: Includes the possibility to limit the application to 25 pages for debugging purposes.
The results of applying different Kernel size and Iterations are shown. 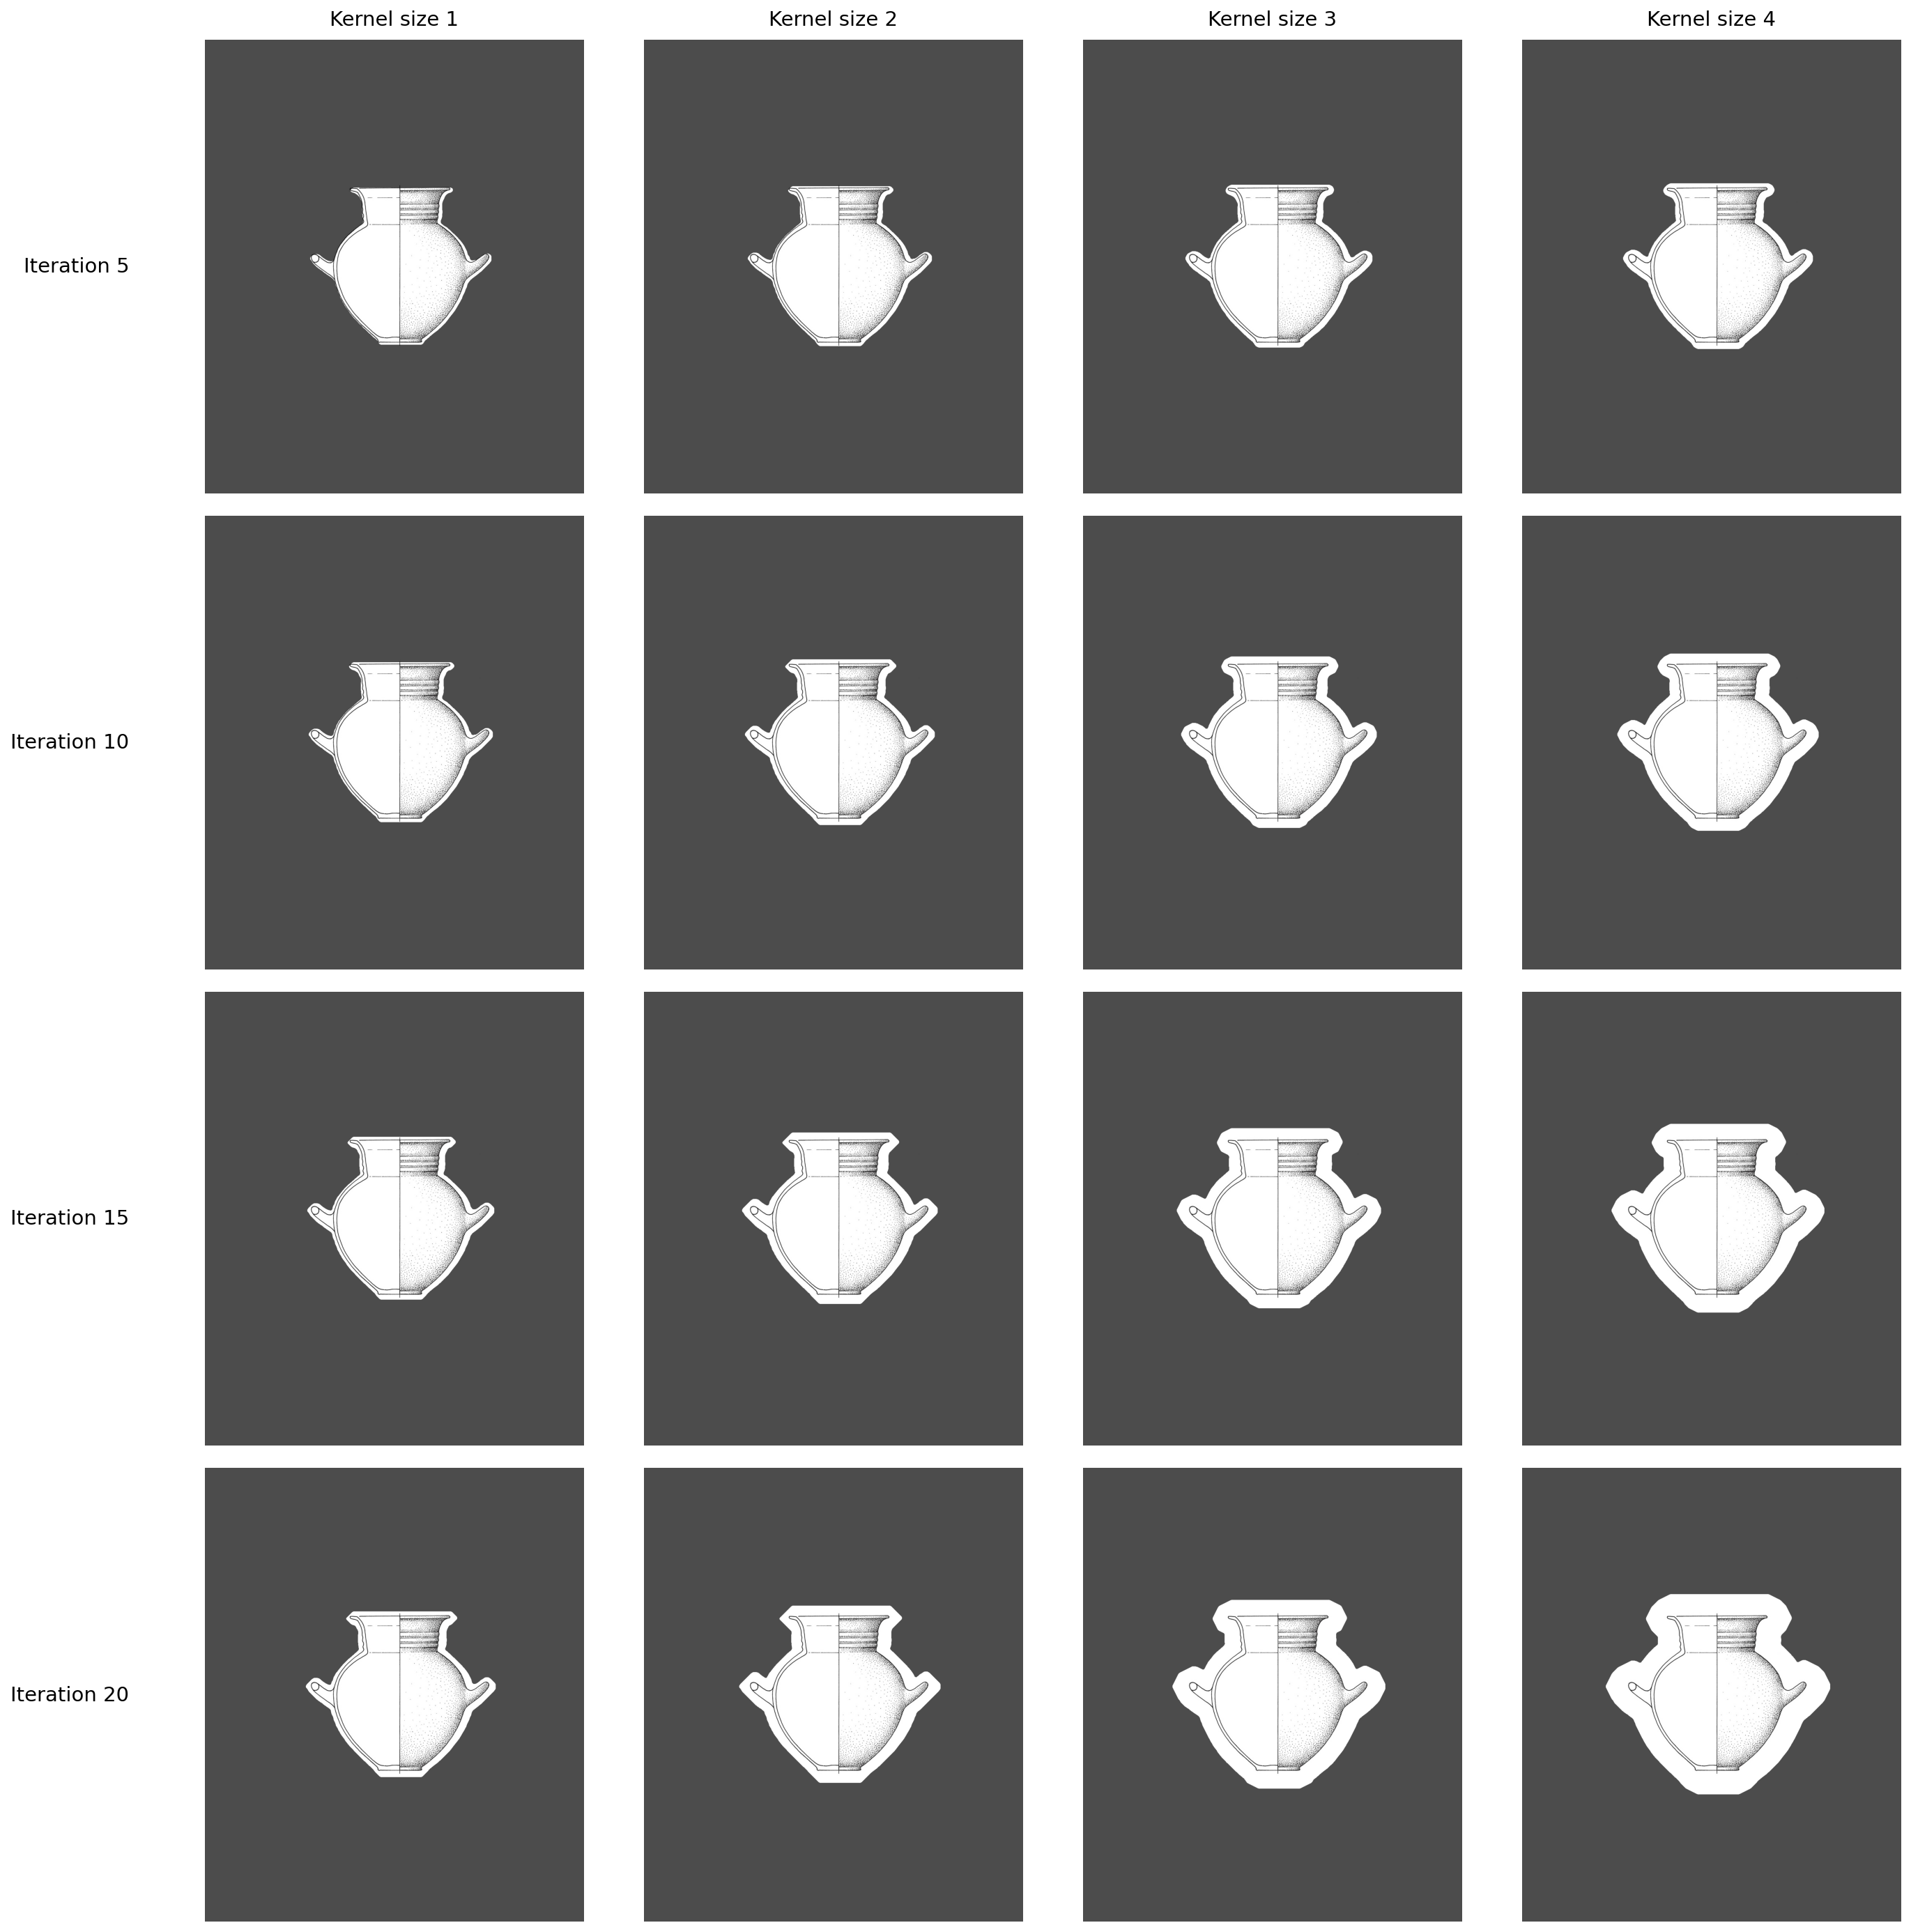
Once you click on 🚀 Apply Model to Project, a progress bar will indicate the status of the process.
To use a different model, place it in the appropriate folder.
Review Annotations
In this tab, you can review and modify the model’s annotations.
- Left: A list of files indicating the pages.
- Right: A canvas showing the image.
You can navigate between images by selecting the name or using the buttons below the image.
In the list:
- Green Checkmark (✔️): Images where the model has identified vases.
- White Dot (•): Images where the model has not recognized any vases.
Editing Masks
You can modify the masks identified by the model using the buttons below the canvas:
- 🖌️ Brush: To draw new masks.
- 🧹 Eraser: To delete existing masks.
- 🗑️ Clear: To delete all masks.
New masks will appear in transparent red.
Once an image without masks (white dot) is modified, the indicator will update to a green checkmark.
Changing the image or clicking on 💾 Save Current Mask will save the changes.
Once you have reviewed the images, you can extract them by clicking on 📤 Extract Cards.
Tabular Information
This tab allows you to insert tabular information for the images.
- Center: A canvas displaying the image where each identified element is associated with a bounding box and an ID.
- Left: A file list for navigation.
- Right: A table where you can enter tabular information.
Each record is indicated by an ID visible on the canvas. To add a column, write the name and click ➕ Add Column. Once the information is entered, you can click on 👁️ Mark as Reviewed. The inserted columns are persistent across the project’s images.
Post Processing
Finally, you can post-process the images to standardize them (e.g., profile on the right and rim facing upwards).
GUI Layout
- Left: List of images, processing options, and navigation buttons.
- Right: A double canvas (initially only the left one is active).
Workflow
To start post-processing, click on 🔍 Process All Images. The model will highlight the position and conservation status of the pieces. The positioned vase will appear in “Processed Image”.
You can navigate through the records using the buttons and the file list.
If the model has misclassified a vase, you can manually modify the classification.
You can also set image transformations to lock specific transformations.
Once post-processing is complete, click on 📦 Export Results to save the images in a ZIP folder.
An Excel file (.xlsx) containing the previously added tabular information will be exported along with the images.
Project Management Details
Once created, you can reopen a project. Available projects are listed in “Your Projects” within the Project Manager tab.
The project card displays information about the work, such as:
- Number of images
- Number of masks and annotations
- Progress
- Creation date
- Last modification date
You can select or remove a project from this view.
Removing a project will delete all associated data.